
We make most things from scratch around here. I’ve made sandwich bread for years, but my favorite is French bread. We all love it so much that I’ve even started making sandwiches with it! Yep- PBJs on soft French bread is what’s for lunch around here. Of course it makes a perfect companion for any soup or salad, and also makes great garlic bread. We even love it plain or with butter. You really can’t go wrong with homemade soft French bread.
My favorite part about French bread in general is the soft, yummy inside. I have never been a big fan of the crunchy outer crust. That’s why I love this soft French bread. It’s ALL soft, outside and in.
For those of you who are intimidated by any sort of homemade bread, I made a complete photo tutorial to make it super easy for you. Trust me– you’ll want to give this recipe a try.
Will homemade French bread save me money?
I know what you skeptics are thinking. A loaf of French bread costs a dollar or two at the grocery store. Why would you want to spend time making your own? How could that really save money?
Have you ever gone to the store and walked out with just French bread? I didn’t think so. While the loaf itself isn’t going to break your budget, you will inevitably pick up more than just bread when you drop by intending to just grab a loaf to go with your spaghetti.
Oh, and trust me when I say it’s SO much better than what’s been sitting in a paper bag at the store for who knows how long.
Are you ready? I’ll start with the recipe intertwined with the photo tutorial. Scroll to the bottom for the printable version.
Ingredients
- 2 Tablespoons Yeast
- 3 Tablespoons Sugar
- 1/2 Cup Hot Water
- 2 Cups Hot Water
- 1 Tablespoon Salt
- 1/3 Cup Oil
- 6+ Cups Flour, divided
- Butter
Instructions
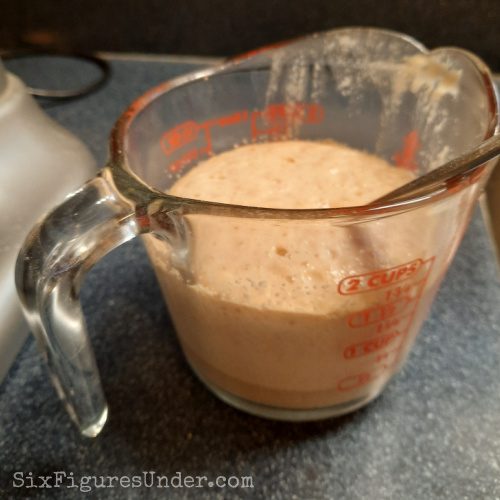
In a small bowl, mix together yeast, sugar and 1/2 cup hot water. Let sit.
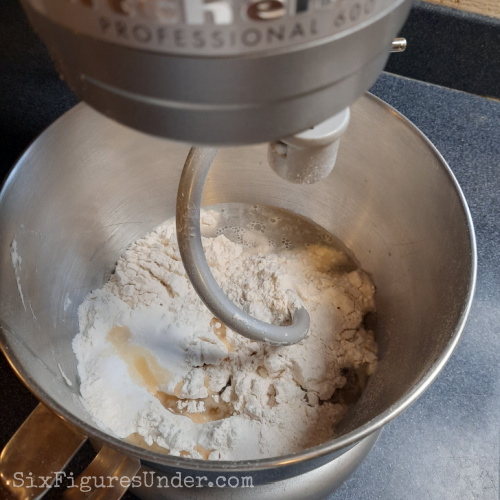
In a large bowl (I use my Kitchen Aid mixer bowl), mix 2 cups hot water, salt, oil, and 3 cups of flour.
Add yeast mixture.
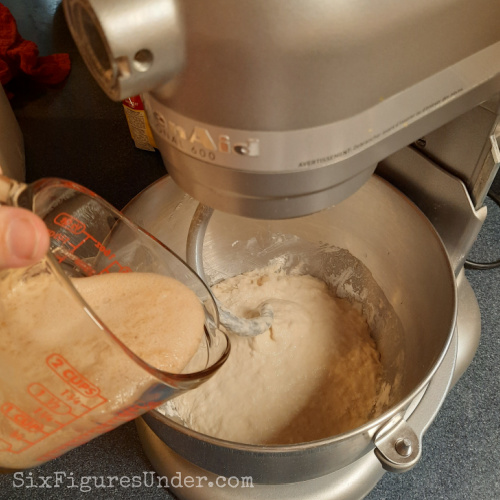
Mix until incorporated. Add in 3 more cups of flour and mix until dough pulls away from sides and forms a ball. You may have to add up to 1/2 cup more flour. You want the dough so that it isn’t too sticky to touch.
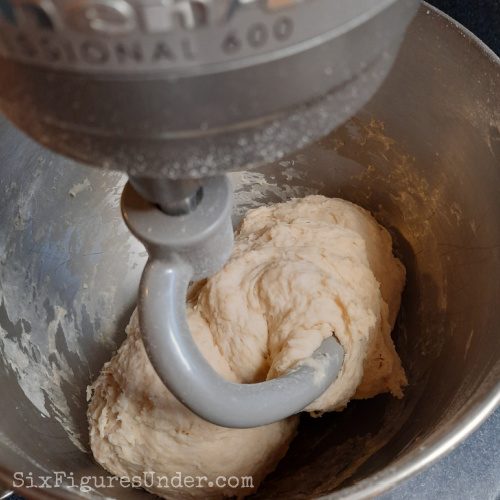
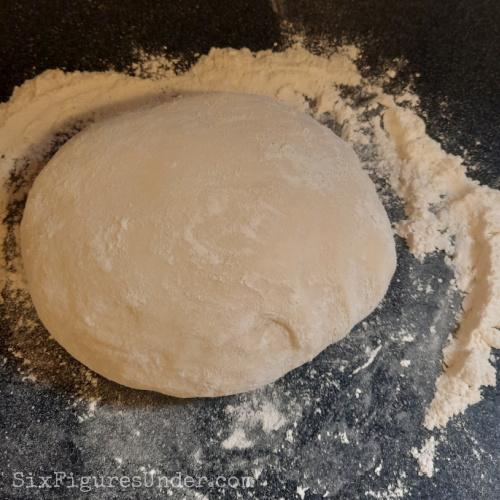
When dough is a nice consistency, move to a floured surface. Knead 30 times.
When I knead, I fold the top of the dough down on itself and push with the heels of my hands. Then I turn the dough 90 degrees, fold the top down and push again. Each time I push down the dough, I count.

Set a timer for 10 minutes and allow the dough to rise. When it beeps, come back and knead the dough about 20 times. Set the timer again and repeat 4 more times for a total of 5 kneading sessions. I use wheat flour to roll out the dough, even though I make the bread with white flour.
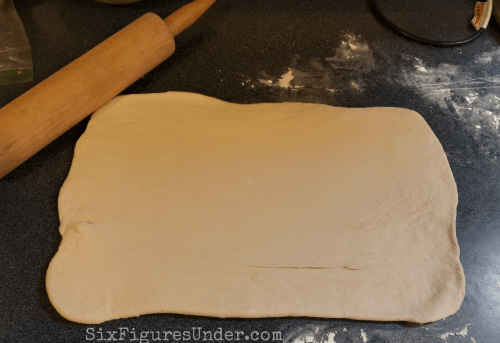
Divide the dough in half. Take the first half of the dough and roll it out into a rectangle. The length of the rectangle should be approximately the length you want your bread. It takes some persistence to get the dough rolled out, as it likes to stretch then shrink back. It will have lots of air bubbles in it that you will be rolling out. It reminds me of bubbles in silly putty. Try going from the middle out to each corner. You might have to get out your muscles and show it who’s boss. In time you’ll end up with a nice-looking rectangle.
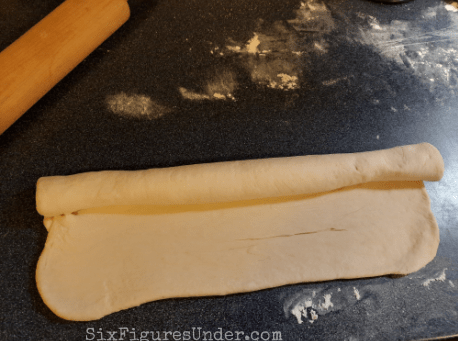
Starting on a long side, roll the dough up to form the loaf. Tuck the ends under and place on an ungreased cookie sheet.
Using a serrated knife (I use a steak knife), cut three or four diagonal slashes on the top. Cut deep enough that it goes through a couple of layers of dough.
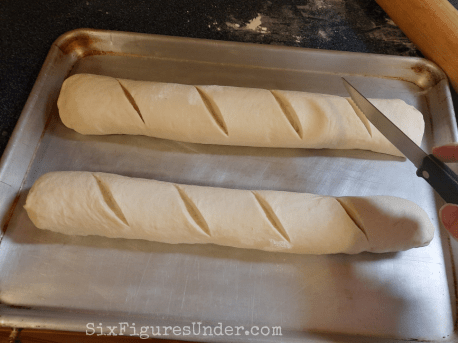
Form the second loaf the same way.
If you want you can brush with egg whites. Call me lazy, but I always skip this step.
Allow loaves to rise for 30 minutes.
Turn the oven to 375 degrees. Bake loaves for 25-30 minutes or until they’re just past golden brown.
After removing from oven, use a stick of butter to coat the top and sides of the loaf. The butter keeps the crust nice and soft, and gives a nice shine and that yummy buttery taste.
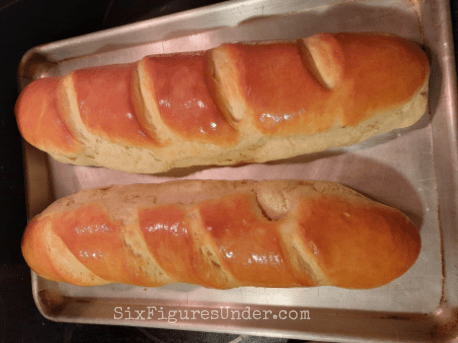
Cut with a bread knife and serve warm (but it’s delicious when it’s cool too).


- 2 Tablespoons Yeast
- 3 Tablespoons Sugar
- ½ Cup Hot Water
- 2 Cups Hot Water
- 1 Tablespoon Salt
- 5 Tablespoons Oil
- 6+ Cups Flour, divided
- Butter
- In a small bowl, mix together yeast, sugar and ½ cup hot water. Let sit.
- In a large bowl, mix 2 cups hot water, salt, oil, and 3 cups of flour.
- Add yeast mixture. Mix until incorporated.
- Add in 3 more cups of flour and mix until dough pulls away from sides and forms a ball. You may have to add ½ cup more flour. You want the dough so that it isn't too sticky to touch.
- When dough is a nice consistency, move to a floured surface. Knead 30 times.
- Set a timer for 10 minutes. When it beeps, come back and knead the dough 20 times. Set the timer again and repeat 4 more times for a total of 5 kneading sessions.
- Divide the dough in half. Take the first half of the dough and roll it out into a rectangle. The length of the rectangle should be approximately the length you want your bread. It takes some persistence to get the dough rolled out, as it likes to stretch then shrink back. It will have lots of air bubbles in it that you will be rolling out. Try going from the middle out to each corner. You might have to get out your muscles and show it who's boss. In time you'll end up with a nice-looking rectangle.
- Starting on a long side, roll the dough up to form the loaf. Tuck the ends under and place on an ungreased cookie sheet.
- Using a serrated knife (I use a steak knife), cut three or four diagonal slashes on the top. Cut deep enough that it goes through a couple layers of dough.
- Form second loaf the same way.
- If you want you can brush with egg whites.
- Allow loaves to rise for 30 minutes.
- Turn the oven to 375 degrees. Bake loaves for 25-30 minutes or until they're just passing golden brown.
- After removing from oven, use a stick of butter to coat the top and sides of the loaf


When you say “hot water”, about what temperature? Don’t want to destroy the yeast 😱
Between 105 and 115 degrees. 🙂
Hi Stephanie,
Can you give more instructions on using this recipe for rolls instead of loaves?
Thanks!
Hi Nicole! When I make rolls, I just let the dough rise once (or twice if get busy doing something else!). I divide the dough into two portions (what would otherwise be the two loaves), then with each of those portions, I divide in half, then each half in half again (now each “loaf” is 4 pieces) then I divide each piece into 2 or 3 depending on the size I want. I think I usually do 3 pieces (so each loaf makes 12 rolls. I make each piece into a nice ball by tucking the edges under. Space the rolls out on a baking sheet, then cover with a dish towel and let rise. It’s okay if the touch when they rise (I like it when this happens). After they’ve risen nicely, bake for less time than the bread. Time will depend on the size of the rolls, but start with 12 minutes, then add more time as needed. When they are done, top and bottom will just start to be golden.
Finally!!! This is the exact type of bread with softness that I’ve been looking for. It’s easy and really good.
Wow! What timing! I teach French to a home-school Co-op. The teens want to cook. We made Croque Monsieur last week. I can’t wait to try loaves of French bread! Thank you!
Can I make this in my bread machine
Does it matter what kind of oil? Can this be mixed by hand?
You can definitely mix it by hand. We use canola oil but any cooking oil should work.
This is what I was looking for on internet…this is perfect recipe of french bread which I am going to try, your explanation is super with proper picture presentation..helps a lot, thanks for sharing and keep going
Hey, trying this today and I’m having to add a LOT of flour-do you weigh your ingredients or use measuring cups? I’m usually a wetter is better kind of bread maker but this stuff is REAAAALLLLY sticky!
This is the recipe I have been looking for!! Soft inside, wonderful flavor and a nice crust. Thanks so much
Tried this recipe tonight for some meatball sandwiches. It was fantastic! My kids & husband loved the bread, and he said it was the best meatball sandwich he’s ever had! I’ll definitely be making this bread agian. Thanks for sharing!
Is this dough able to be refrigerated? I bake this bread all the time and I’ve needed to refrigerate to bake it later a few times!
Yep! Refrigerating dough just slows down the rising process (so it will still rise, just more slowly). You can also freeze the dough.
I use this bread for cinnamon rolls and let the cinnamon rolls rise in the pans overnight then I take them out in the morning and they have risen and are ready to bake.
Here’s the cinnamon roll variation: https://www.sixfiguresunder.com/cinnamon-rolls-cream-cheese-frosting/
What type of flour are you using? All purpose?
Yep! All-purpose flour. Though I’ve made it with whole wheat (and a combo of all-purpose and wheat) too and it’s still delicious!
I rarely leave comments though I avidly cook from online recipes. I’ve baked this bread a few times now. My daughter fell sick and could eat only home bread and since then it’s a staple. Love love it. On occasion the loaves have spread out a bit and on others they look divine picture book quality. Wish I could share pics here I’ve tried subbing whole wheat about 1/3 and that’s not bad either! Thank you.
What type of flour self rising, all purpose or bread flour is best to use?
I just use regular all-purpose flour or a mix with whole wheat flour.
Is there a way I can make this in the morning and then bake at dinner? Like if I form the loaves and then leave in the fridge?
Thanks!
Yep! Refrigerating slows down the rising process.
Thanks for this recipe. I’d love to be able to leave 3.5 stars. The bread came out quite dense despite the repeated rising / kneading, but has a beautiful, delicious crust and a great flavor. I’ll certainly try it again (and enjoy these loaves despite the not quite perfect consistency)!
I love this recipe. I used it as a starting point for making a super multigrain bread which my husband devours! I did retain all the basic instructions/process and proportions that you provide, especially the multiple short kneads which seems to be the magic behind a nice fluffy loaf. (also a little vital wheat gluten to counteract all the heavier grains).
Wow, I cannot believe how soft and delicious this bread is. I came across this yesterday and decided to make it late at night. My arms are a bit sore still from kneading the 5 times, but boy was it worth.
I’m not sure how to share pictures, but they are very similar to the ones here. Follow the recipe. Put in the extra work on the 5 sessions of kneading. And then share with your family and loved ones.
What I found amazing other than the smell of fresh bread baking in the house, was seriously how soft it was. After I cut my first slice, you can feel how spongy and soft it is. Mine didn’t rise as much, maybe i need bread flour??? But it was softer than anything I’ve had at a store before.
Will be making this part of my regular routine!
Thank you!
Hands down the best French bread ever! Tastes better then the store bought stuff! Love this! Made it twice in a week!
I just made this….and am eating some right now….what a great recipe! Can’t wait to have it with supper tonight! We made pizza last week with your pizza dough recipe and loved how easy and delicious it was. I’m going to try the peanut butter oatmeal chocolate chip cookies next, then the home-made bagels!
Mine was a bit heavy. It may have been the result of using part white-wheat flour. It taste great, but the interior is a bit more dense–not fluffy like yours appears. I’ll try again.
Sometimes I use all wheat flour and it is still fluffy. Did you let it rise and knead it down five times? I think that’s what helps it be so fluffy. Good luck! 🙂
Dear Stephanie,
I have been reading your blog for a long time, but this is my first time commenting.
I have been planning on starting to bake bread but did not get around to it until just a few weeks ago.
I baked a few loaves since then (various recipes) and they all came out really good, but your French Bread seems to be a winner 😉
I have been reading late tonight (I am on staycation this week) and just went back to the kitchen to cut myself a slice (with lots of butter). So so good. I seriously need to stop eating!
Thanks so much for this recipe.
Hi Mariana! Thanks for reading! I’m glad you are loving the bread. I’m planning on making some today, in fact! 🙂
I’m eating a piece of my loaf right now and it’s amazing! I halved the recipe because I made pizza dough yesterday and it didn’t rise. I was nervous I would screw this up too! (Ended up having flatbread instead, which was delicious!). Funny thing is, my bread baked up HUGE! It was much bigger than I thought it would be. I’m so excited! I’ve been wanting to start making my own bread and stop buying it, and now I can! Thanks so much for posting Stephanie!
Awesome Tracie! I’m glad you like it! I made some just yesterday to have with dinner. It’a always a hit around here!
Your loaves look so pretty! I recommitted to baking bread this year, and so far, we haven’t bought any store bought bread in 2015! It tastes so good, plus I realized that a loaf of my homemade bread cost me (at most) $0.49 a loaf…but it’s generally cheaper because I stock up on flour deals. I love baking bread that we can enjoy – and saving our family money in the process.
Oh my! You must have read my mind. We had spaghetti and meatballs last night ans i so wished I had had a great french bread recipe. We settled for artisan bread, but now that I have this recipe I’m going to have to make spaghetti again!
Yum! I am pinning and trying this! Thanks for sharing.