
It’s blackberry season where we live, which means free blackberries are available in every direction. The kids had been begging to go berry picking because we have been out of blackberry syrup for too long and we need to restock. Sure we have other kinds of syrup, but nothing compares to homemade blackberry syrup. It’s everyone’s favorite!
Everyone was thrilled that last week’s Family Night activity involved picking buckets of blackberries on the side of the road. No one even complained about the thorns!
Homemade blackberry syrup really is as good as it gets! You’ll be looking for pancakes, waffles, ice cream, cheesecake– whatever you can use as a vehicle to get this stuff into your mouth. If you’re shameless, like me, you may just grab for a spoon! (You think I’m kidding?!)
If you want a video tutorial for making your own blackberry syrup, check out the video below, otherwise, keep scrolling down for the written directions with photos and a printable recipe at the bottom!
Ingredients
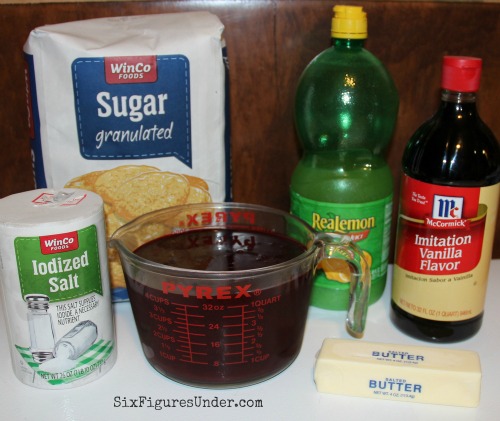
- 4 cups blackberry juice/pulp, de-seeded
- 1 1/2 cup sugar
- 1 Tablespoon bottled lemon juice
- 1/4 teaspoon salt
- 2 Tablespoons butter
- 1/2 teaspoon vanilla
De-seeding Blackberries
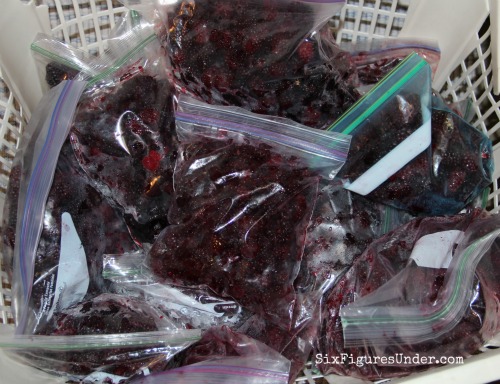
If I’m not making blackberry syrup right away, I just put them straight into freezer bags. I try to hold off making jams and syrups until the berries are done for the season. By that time, I really want to take back my freezer space anyway.
Here’s my freezer stash of blackberries from a few years ago. It filled a laundry basket. I left them in the basket to thaw.
When I’m ready to de-seed the berries, I warm them up on the stove. You get a lot more juice out of hot berries than cold ones.
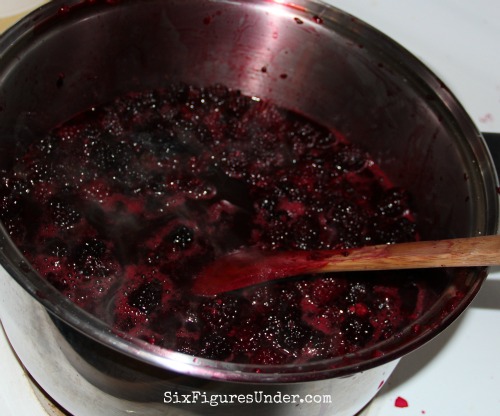
Start by de-seeding your berries. I used to use a strainer like the one in the picture below for years. It works fine, but has a limited capacity. Plus, it always seems like there is more juice left in the seedy part, but it’s very tedious to get it all out.
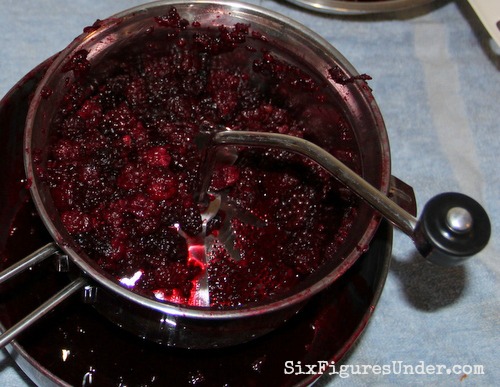
I have no idea why I didn’t buy a berry screen for my food strainer sooner. It works like a dream!! I love using a food strainer for making homemade applesauce. The screen that comes with it is perfect for apples and tomatoes. The berry screen has smaller holes than the apple/tomato screen so it keeps back all those annoying blackberry seeds. It made the de-seeding process so simple!
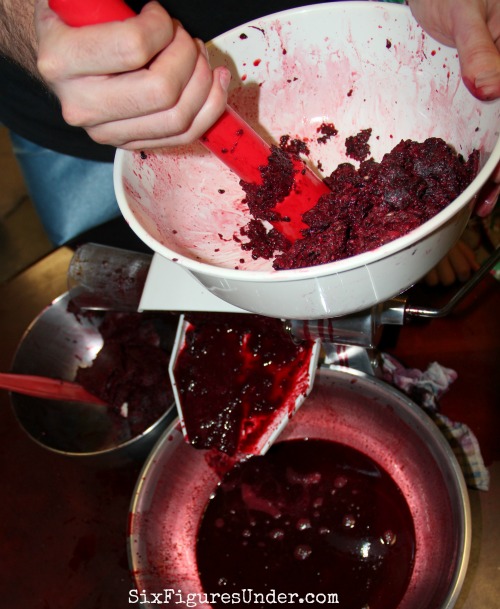
My kids love to help with the de-seeding process (and the apple-saucing process). Since the strainer is so easy to use, the kids can help and actually be really helpful!
Making Blackberry Syrup
Unlike making jam, you can double or triple this recipe without any trouble. I make as much at a time as will fit in the pots I’m using, but I will share the recipe for one batch.
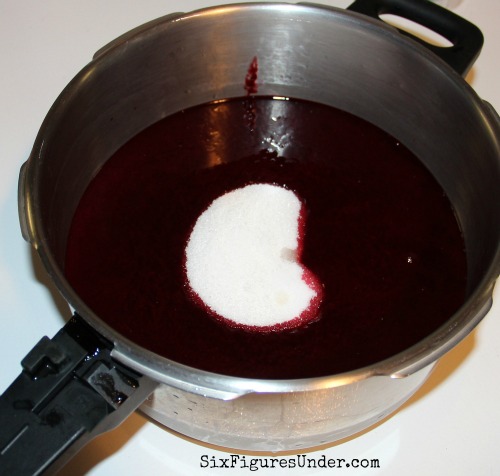
In a large saucepan, mix 4 cups of blackberry juice/pulp with sugar, lemon juice, and salt.
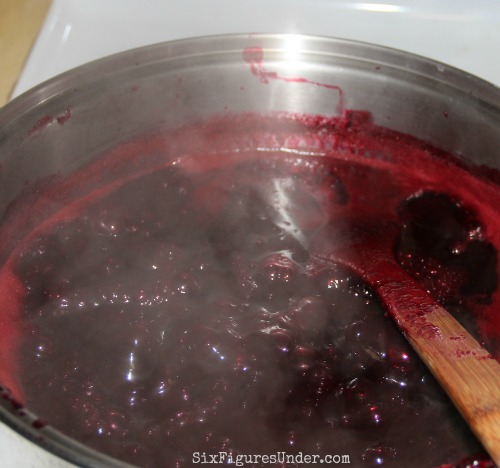
Over medium heat, bring the mixture to a boil while stirring constantly. Boil for four minutes.
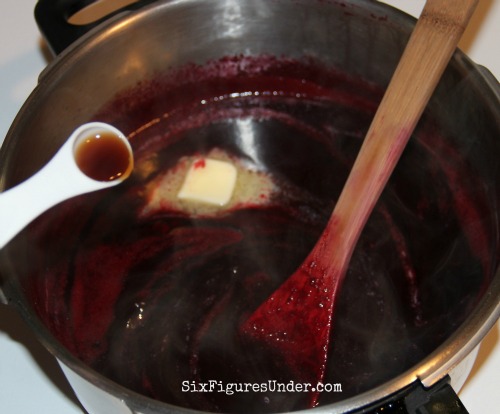
Remove from heat. Stir in butter and vanilla until completely combined. These are the secret ingredients for truly amazing blackberry syrup!
At this point you can use it fresh, freeze it or can it. It will be fine in your fridge for a couple of weeks or in your freezer for much longer.
If you’re freezing it, you can use empty peanut butter jars or salad dressing, syrup bottles, or any other handy freezable container.
Canning Blackberry Syrup
Canning is only slightly more complicated, but if you’re familiar with the canning process, then it’s pretty simple.
I usually use quart jars for our family (we go through lots of this stuff!) and pint jars to give as gifts (that way I can give them to more people!).

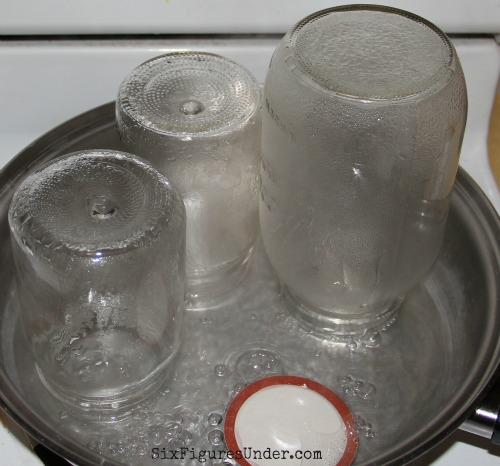
You’ll start out by washing your jars in hot soapy water. Sterilize the jars by turning them upside down in a pan of simmering water. Put your flat lids in the simmering water as well. Alternatively you could run the jars through a cycle in the dishwasher.
Ladle your hot syrup into hot jars.
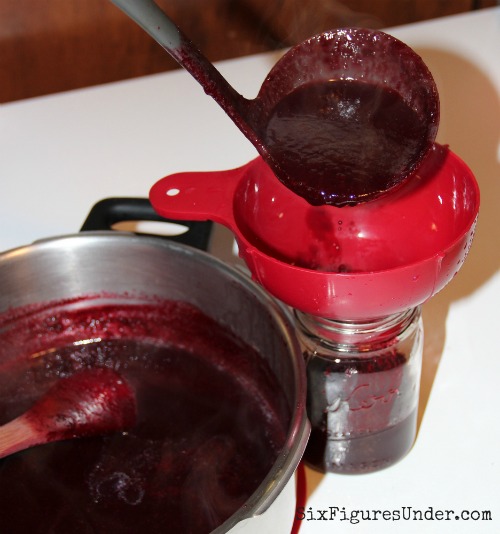
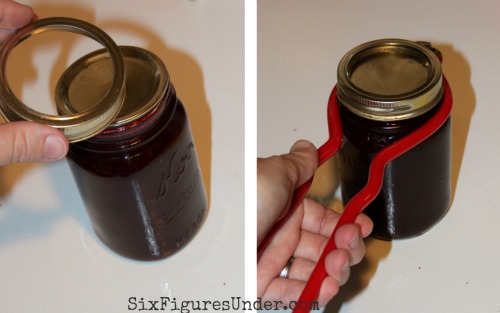
Fill the jars leaving about 1/2 inch of space at the top. Clean the rim of each jar before putting on the lid. Put on a hot flat lid and screw the ring on tight.
Process
Pints (or smaller)
In a water bath canner or steam canner
, process hot syrup in pint jars or smaller according to the table below which takes into account your elevation.
| Jar Size | 0 – 1,000 ft | 1,001 – 3,000 ft | 3,001 – 6,000 ft | 6,000-8,000 ft |
| Pints (or smaller) | 10 min | 15 min | 20 min | 25 min |
Quarts
I mentioned earlier that I can syrup (and jam) in quart jars. Nowadays, they never give a processing time for quarts of jam, but you can find times in older books. My mother-in-law has always done jam in quart jars without a problem, so that’s what I’ve always done and I am perfectly fine with it. I process quarts for about 5 minutes longer than I do pints.
To put it into perspective, when our grandmas canned jam, they didn’t even process it. At all. Just having the hot jam in the jar will make the lid seal, so that was that. My grandma still just turns the jam jars upside down to make them seal. The USDA says that it is effective, there is just more room for error if the jam cools down too much before you get the lid screwed on, so to be safe you should process the jars. For jam, the only real risk is mold, which is easy to detect and not nearly as scary as the potential for botulism if tomatoes or green beans are not processed properly.
If processing quarts makes you nervous, just do pints.
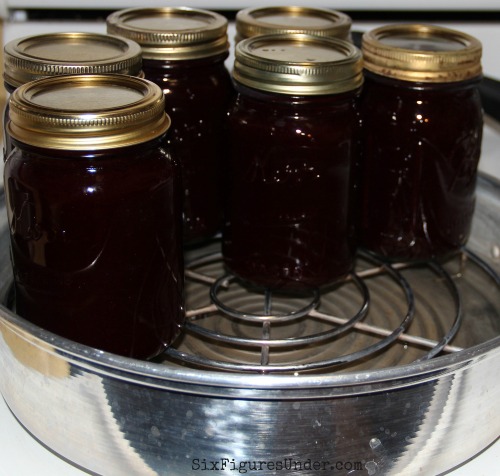
I prefer using a steam canner which takes less water and is not so bulky. In a steam canner, you start timing once the steam coming out the hole is at least the length of a quart jar. You can turn the heat down (so it doesn’t steam like crazy) as long as you still have a steady stream of steam. When the time is up, turn the stove off. Remove the lid by lifting it away from you so you don’t get a face full of steam.
In a water bath canner, water should cover jars by at least an inch. Start timing when the water reaches a vigorous boil. You can turn heat down slightly as long as at least a steady, gentle boil continues throughout the processing time. Keep the canner covered the entire time.

Cool Jars, Remove Rings, Wash Jars
Using the jar lifter from your canning tools (or just a hot pad if you’re using a steam canner), move your jars to the counter. I usually set them on a towel and let them cool overnight in a non-drafty area.
About 24 hours later, remove the rings, wash the jars and check the seal. Pull up lightly on the flat lid with your finger to test the seal. If it pulls off easily, the jar did not seal right. Don’t fret because you can put the unsealed jar in the fridge to use first.
All the jars that sealed well can be stored for years in your pantry or any other relatively cool and dark location. Label them with the year and contents so that you can keep your food storage rotated.
Serving Suggestions
Blackberry syrup is great on breakfasts or desserts. We love it on:
- Pancakes
- Waffles
- French Toast
- Ice Cream
- Cheesecake
- Yogurt
You seriously can’t go wrong! It also makes a lovely gift!

Print the Recipe
- 4 cups blackberry juice/pulp, de-seeded
- 1½ cup sugar
- 1 Tablespoon bottled lemon juice
- ¼ teaspoon salt
- 2 Tablespoons butter
- ½ teaspoon vanilla
- In a large saucepan, mix 4 cups of blackberry juice/pulp with sugar, lemon juice, and salt.
- Over medium heat, bring the mixture to a boil while stirring constantly. Boil for four minutes.
- Remove from heat. Stir in butter and vanilla until completely combined.
- At this point you can use it fresh, freeze it or can it. It will be fine in your fridge for a couple of weeks or in your freezer for much longer.
- If you're freezing it, you can use old salad dressing bottles or old peanut butter jars.
- For detailed photo tutorial, de-seeding instructions, and canning instructions go to www.sixfiguresunder.com/best-blackberry-syrup

You’ll Also Enjoy:


The flavor was excellent, the consistency was really watery. I fixed my double batch with liquid pectin and divided into two batches, one packet of certo in each to get it to set. I would not double the batch in the future, and add pectin initially.
Once you open the jar of syrup, how long is refrigerated shelf life?
I’m not sure. My family gobbles it up so fast that we haven’t found out how long is too long!
Gotta love auto correct. I wrote great!
This syrup is greasy! My 9 yr old granddaughter loves it. I followed the recipe as it is and got 4 pints to can.
Made blackberry syrup today using your recipe and it is delicious. You have some really good ideas to share. Thank you!
This looks so delicious. thanks for sharing this recipe.
Blimey, this syrup look incredible.
I’m going to follow this, pour it over some freshly made pancakes and update you with the results!
Thanks for sharing this!
We are canning our blackberry syrup. How long is the shelf life? Some sites say 6 months.
I just finished some blueberry syrup and some black & blue-berry syrup following this recipe. I had already made juice from berries a week ago, so all I had to do was make the syrup. Super fast! Super easy! I am storing the syrup in qt jars while I wait for my pretty syrup jars to arrive. Thanks so much for such complete and simple directions.
I juiced my berries so no pulp should I add more sugar or pectin the syrup when I put in the bottles was very runny
Did it thicken up when it cooled? If not, you could add some Sure Jell LIQUID pectin. It is made to be added after the sugar. Mine got thicker as it cooled. I did not use any pulp either and I did not add pectin.
Just a question. Do I have to de-seed? Can I leave them in and still process/can it?
This is a wonderful recipe. I have made Blackberry and Strawberry Syrup. Both are very tasty. I used my Stainless Steel Juice extractor to collect the juice. Very easy recipe.
Excellent. The only recipe in the Ball book uses corn syrup – which I of course don’t make – so kinda defeats the purpose 😉 Also happy to see someone else uses/loves their steam canner!
Could you clarify how many pints size jars this recipe will make?
This sounds absolutely delicious. My hubby is a blackberry fanatic; so I am sure he will love this when I make it.
How much does onr batch make?
This looks wonderful, just wondering if its safe to use butter in the recipe when one wants to can the syrup?
I want to know this too! The recipe makes a delicious syrup, and I canned some using the water bath method, but wasn’t really thinking about the fact that the recipe includes a dairy product.
You can. Most of the recipes in the jam recipe booklet that comes in the box with “Certo” pectin state that if you want to reduce the foam you can stir in a small amount of butter before canning it.
My syrup has hard-ish bits in it now that I’m finished and it has cooled. Is this the butter that has settled, maybe? Or did something else go wrong? Are we supposed to heat the syrup before using to mix it again?
Not an expert, but wondering if you didn’t bring it to a hard boil–that is one that bubbles won’t reduce down when you stir.
How many blackberries did it take to get 4 cups of juice? I have about 1 1/2 quarts of berries that I haven’t juiced yet.
Your recipe steps are a little confusing. Step #2 is throwing me off. Do you add the butter and vanilla before boiling or after?
Thanks!
Thanks for catching that Diann. There was a duplicate line in the printable recipe (the tutorial part was correct). You add in the butter and vanilla after boiling. So sorry for the confusion (and being so slow to reply). I LOVE this recipe!
This looks delicious! We have two thornless blackberry plants we planted in our backyard this year, and while they didn’t produce much the first year, they really took off foliage-wise. I am hoping for better harvests in the years to come. I have started to use berry syrups in place of maple because maple has gotten so expensive. Thanks for sharing this – a very thorough tutorial!
That’s exciting that you’ll have blackberries in the future! Watch out for the deer and birds because they’ll want some too! 🙂